Note: Ticketing modules are currently in limited access. Please contact our team to enable this feature for your workspace.
All action nodes require setting up in a node form, where you specify the parameters for the selected action.
Ticketing action nodes in SleekFlow allow you to automate ticket creation and management within your workflows. These nodes help streamline customer support by ensuring that issues are tracked, assigned, and resolved efficiently. By configuring ticketing action nodes, you can reduce manual effort, improve response times, and enhance customer satisfaction.
In this article, we will guide you on how to set up every “Ticketing” action node so your flow can execute the appropriate tasks to achieve your desired outcome.
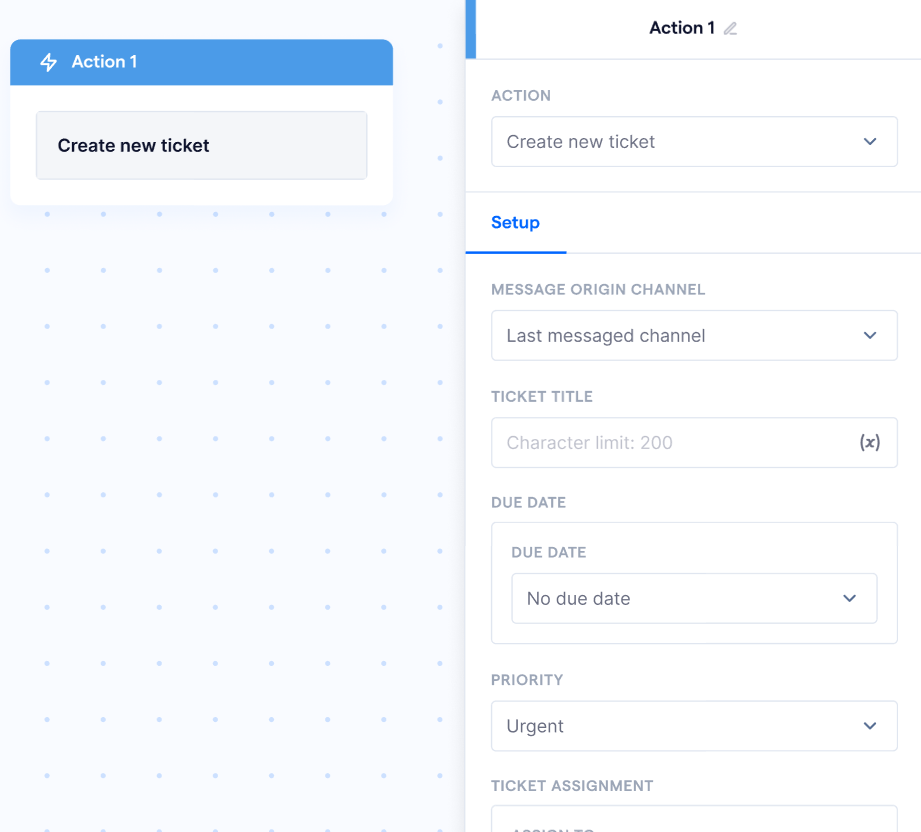
Create new ticket
The “Create new ticket” action node allows you to automatically generate a new ticket in SleekFlow when specific conditions are met. This ensures that customer issues are documented and assigned to the right team or agent without manual intervention.
Common use cases include:
-
Automatically create tickets for customer inquiries
- When a customer sends a message containing keywords like “issue” or “help,” automatically generate a ticket and assign it to the support team. This ensures that every inquiry is properly tracked.
-
Log issues from third-party integrations
- If a customer submits a complaint via an external system (For example:, a CRM or feedback form), create a ticket in SleekFlow to consolidate all support requests in one place.
-
Convert unresolved conversations into tickets
- If a conversation remains unanswered for a set period, automatically create a ticket to ensure that the issue is followed up by an agent.
To set up the “Create ticket action” node, follow these steps:
-
Click on the “Create new ticket” action node to open its form, which will appear on the right side of the screen
-
Once you have selected the “Create new ticket” action node, you will need to fill in the following items:
-
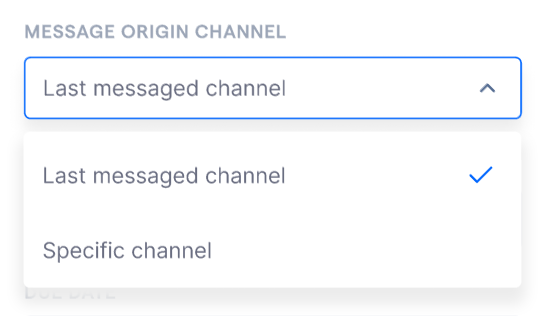
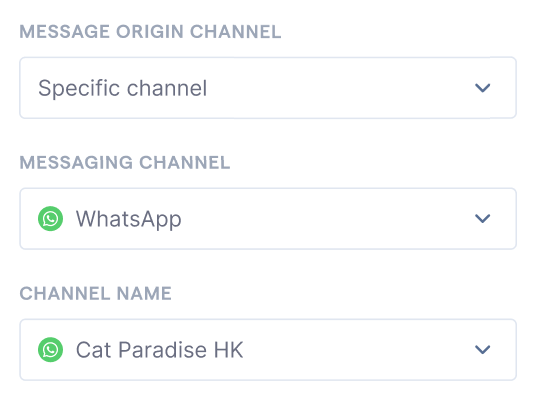
Message origin channel
- Define the “Ticket channel” for the ticket
-
You can choose from these options:
-
Last messaged channel: Automatically use the channel where the customer last sent a message
-
Specific channels: Manually select the messaging channel and specify any of the connected channels available in your workspace
-
Last messaged channel: Automatically use the channel where the customer last sent a message
-
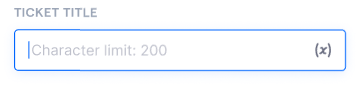
Ticket title
-
Provide a title that summarize the ticket’s purpose
- The character limit for the ticket title is 200 characters
-
You can use variables within the flow to customize your ticket title
-
Provide a title that summarize the ticket’s purpose
-
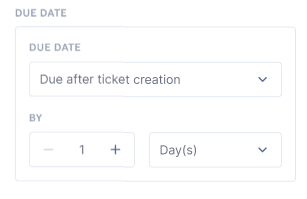
Due date
-
Configure when the ticket is due by choosing one of the following options:
-
Due after ticket creation: Set the ticket’s due time by specifying the number of days or hours from its creation date
-
No due date: Leave the due date field empty for tickets without a set deadline
-
Due after ticket creation: Set the ticket’s due time by specifying the number of days or hours from its creation date
-
Configure when the ticket is due by choosing one of the following options:
-
Ticket type
-
Select a predefined ticket type. For example: Task, Question, Inquiry
-
For ticket type settings, please refer to this Help Center article
-
Select a predefined ticket type. For example: Task, Question, Inquiry
-
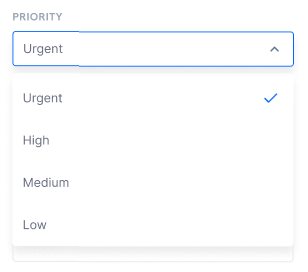
Priority
-
Assign a priority level to the ticket. For example: Low, Medium, High, Urgent
-
Assign a priority level to the ticket. For example: Low, Medium, High, Urgent
-
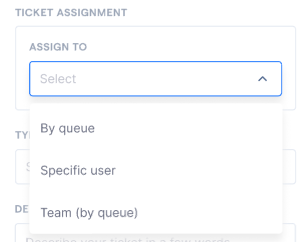
Ticket assignment
-
Assign the ticket using one of the following methods:
- Assign by queue: Automatically assign tickets to users in a queue-based order
- Assign to a specific user: Directly assign the ticket to a particular team member
- Assign to team: Select a team to assign the ticket to its members using a queue-based order
-
Assign the ticket using one of the following methods:
-
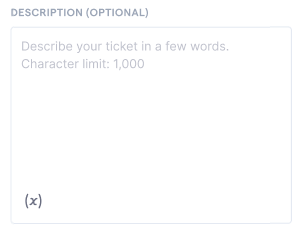
Description
- Add detailed information about the ticket to provide context
-
The character limit for the ticket description is 1,000 characters
-
Message origin channel