What’s supported in SleekFlow
Here are the features available for Salesforce Marketing Cloud in SleekFlow:
- Retrieve contact data from a connected Salesforce Marketing Cloud data extension into SleekFlow
- Send WhatsApp messages through SleekFlow as part of your Salesforce Journey Builder flows
- Track message performance in the SleekFlow Campaign Dashboard
If a feature isn’t listed here, it’s currently not supported in our integration with Salesforce Marketing Cloud.
In this article, we will guide you through setting up your Salesforce Marketing Cloud integrations on SleekFlow. By integrating Salesforce Marketing Cloud, you can set up automated workflows via Salesforce Journey Builder, a feature within Salesforce Marketing Cloud that enables businesses to create personalized and automated customer journeys. This allows you to send messages to your customers through WhatsApp Cloud API channels and manage customer details and conversations.
Access your Salesforce Marketing Cloud API Key and endpoint URL
🔒 The information in this section applies only to Admin account users
To send messages through SleekFlow’s WhatsApp Cloud API via Salesforce Marketing Cloud Journey Builder, you need your Salesforce Marketing Cloud API key and an Endpoint URL to configure the SleekFlow app within Journey Builder.
To access your unique Salesforce Marketing Cloud API key, follow these steps below:
- Click on the
 icon on the left-hand navigation bar
 -
Under “Third-party integrations”, you will find “Salesforce Marketing Cloud” integration
-
Click “Connect”. You will be then redirected to the “Connect to Salesforce Marketing Cloud” page
- Your Salesforce Marketing Cloud API key is located under “Your unique API key”
- Under “Your unique API key”, you will find your “Endpoint URL”. The “Endpoint URL” is SleekFlow’s custom domain for users to call API. When you are setting up the activity to send SleekFlow WhatsApp message on Journey Builder, you will be required to paste this “Endpoint URL”
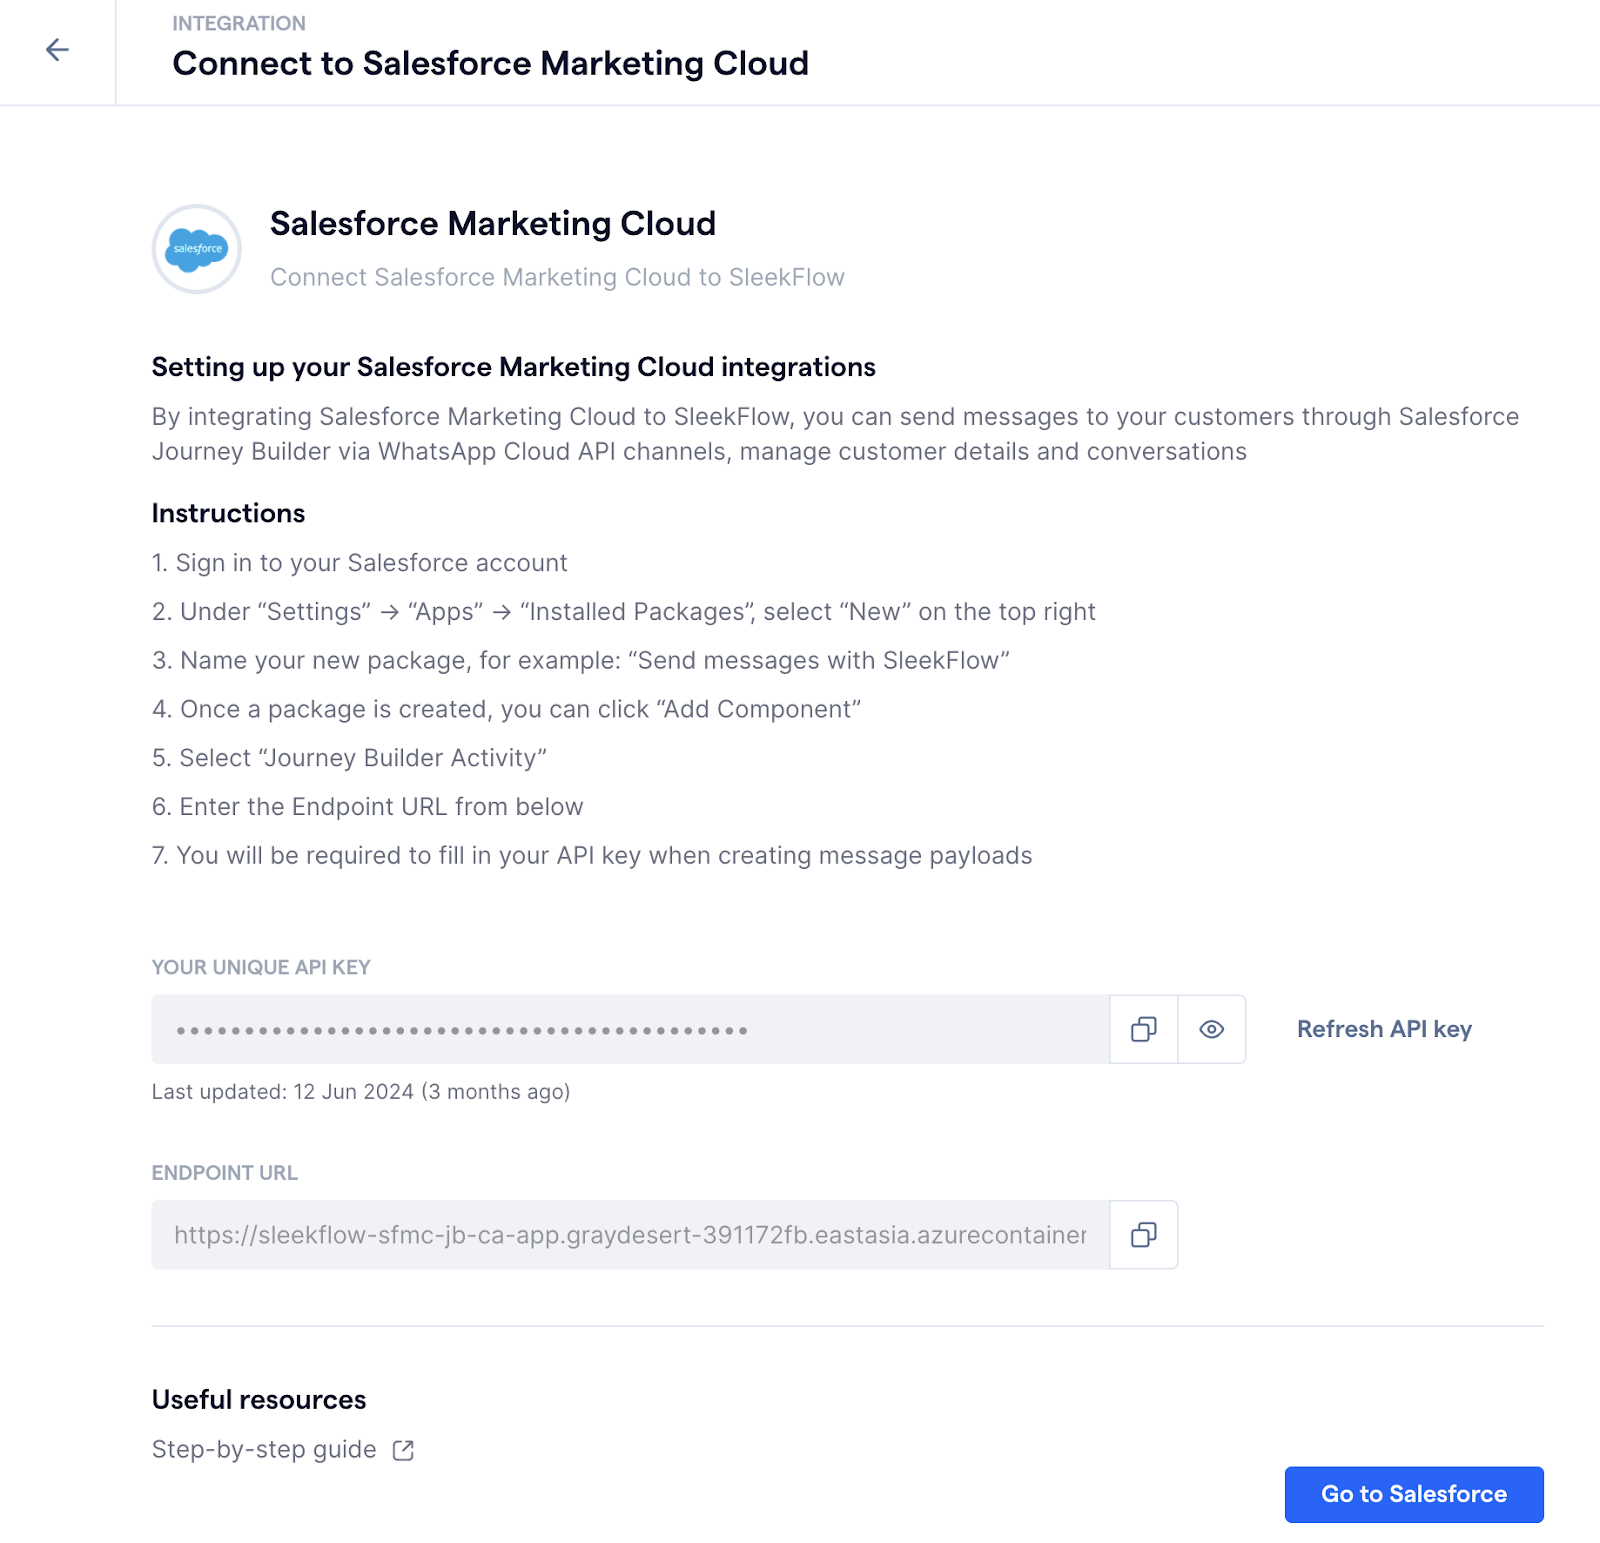
Copy items
- To copy your API key and endpoint URL, you can click on the
 button. The relevant item will be copied to your clipboard
Reveal API key
-
If you want to reveal your API key, you can click on the
 icon to reveal your API key
Note: You should protect your API key to prevent unauthorized access to your data.
Refreshing your Salesforce Marketing Cloud API key
Why should I refresh my API key?
There are several reasons why we recommend refreshing your Salesforce Marketing Cloud keys regularly, including:
- Security: Regularly changing API keys helps mitigate the risk of unauthorized access. If a key is compromised, refresh your API key to limit the time an attacker can exploit it
- Access control: By refreshing your API keys, you can manage and control who has access to your APIs, ensuring that only authorized users or applications can interact with your services
- Revoking old keys: Refreshing keys allows you to easily remove old keys that may no longer be in use, reducing the attack surface of your application
How to refresh my Salesforce Marketing Cloud API key?
To refresh your API key, follow these steps below:
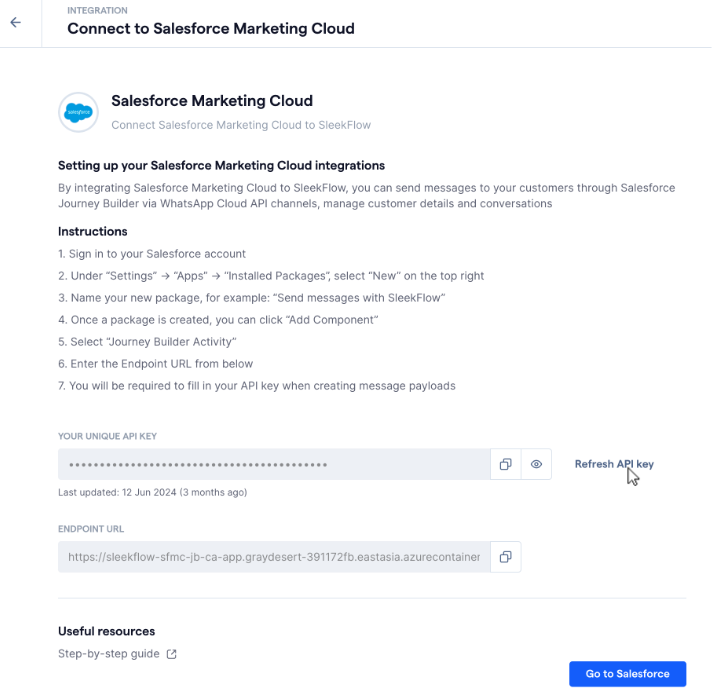
- Visit the “Connect to Salesforce Marketing Cloud” page
-
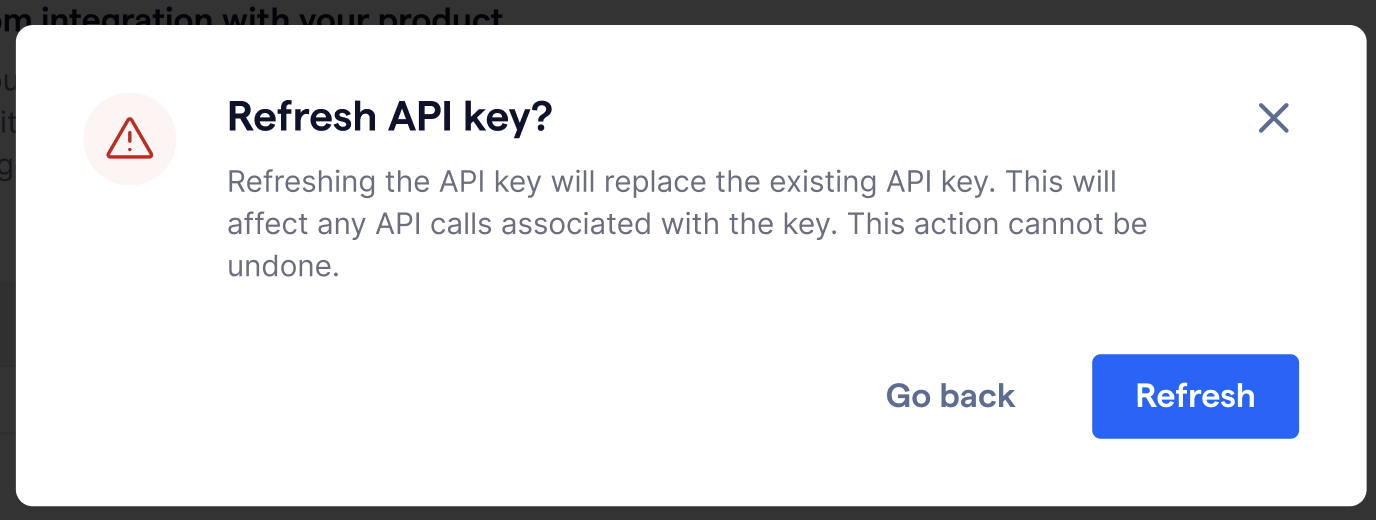
Click on the “Refresh API key” button
-
A confirmation modal will show up. Click on “Refresh”
-
Your API key will be refreshed, and you can view the last updated date of the API key under your API key

Install SleekFlow app as a Salesforce package
To send out a SleekFlow WhatsApp message on Salesforce Marketing Cloud Journey Builder, you have to install the SleekFlow app as a Salesforce package.
What is a Salesforce package?
Salesforce packages are collections of customizations, applications, and components that can be bundled together for distribution and installation within Salesforce environments.
There are two types of Salesforce packages:
- Managed packages: These are typically used for commercial applications. They allow for version control and can be upgraded without affecting the user’s data.
- Unmanaged packages: These are usually used for open-source projects or for developers' sharing of components. Users can modify the contents freely.
Packages can be shared or sold on the Salesforce AppExchange or distributed directly to other Salesforce users.
You can follow the steps below to install the package:
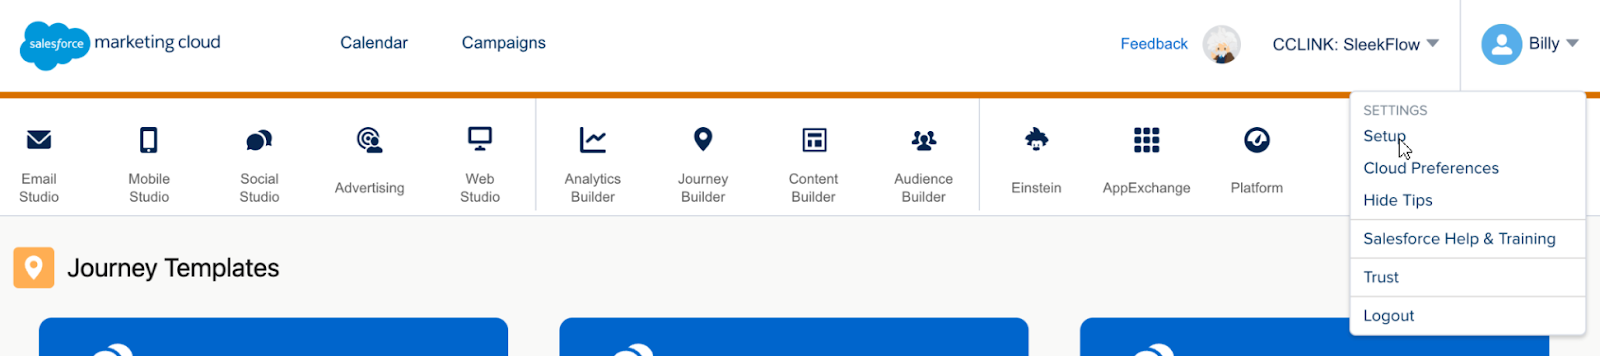
- Sign in to your Salesforce Marketing Cloud account
-
Click on your avatar on the top right. “Settings” dropdown menu will appear. Select “Setup”
- Under “Platform Tools”, there is a “Apps” section, select “Installed Packages”
-
In the “All Packages” page, select “New” on the top right
-
A “New Package Detail” modal will pop up. You have to input a name for the new package. For example, “Send messages with SleekFlow”. Click “Save” once you have completed filling in the details.
-
Once the package is created, you will be redirected to the details page of this installed package. Select “Add Component” at the bottom.
In Salesforce Marketing Cloud Journey Builder, a "component" refers to the individual elements that make up a customer journey. These components allow you to design and automate personalized customer experiences.
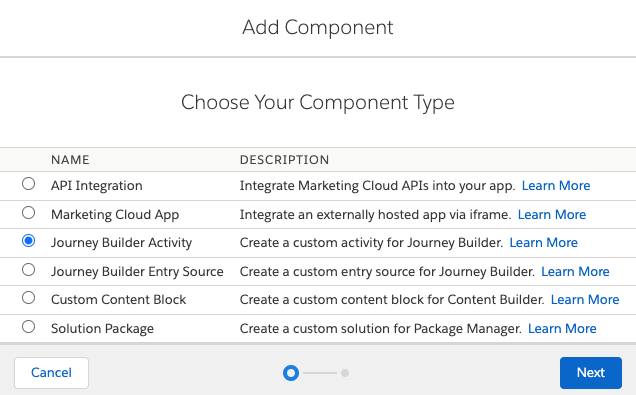
-
An “Add Component” window will pop up, select “Journey Builder Activity” and click “Next”
In Salesforce Marketing Cloud’s Journey Builder, a “Journey Builder Activity” is a specific action within a customer’s journey. Learn more about Journey Builder Activity by visiting Salesforce’s guide here.
- An “Add component” modal will appear. Fill in the following fields:

- Name: Give this component a name
- Description (Optional): Describe this component in a few words
- Category: Choose “Messages” from the dropdown.

- Endpoint URL: The URL can be found in the “Connect to Salesforce Marketing Cloud” page. Then, click “Save”
-
Your SleekFlow app is successfully installed as a Salesforce package


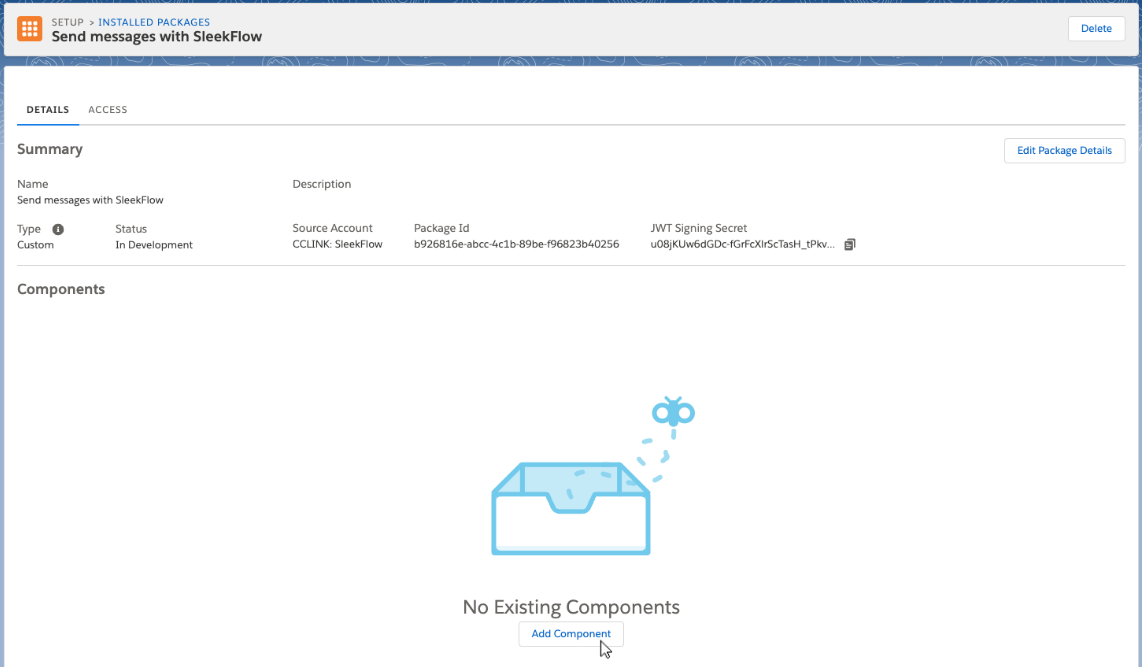

Note: the SleekFlow app is only available to the user account, but not the entire Salesforce organization. If multiple Salesforce users are required to set up Journey using the SleekFlow app, please repeat the above steps for each Salesforce user account.
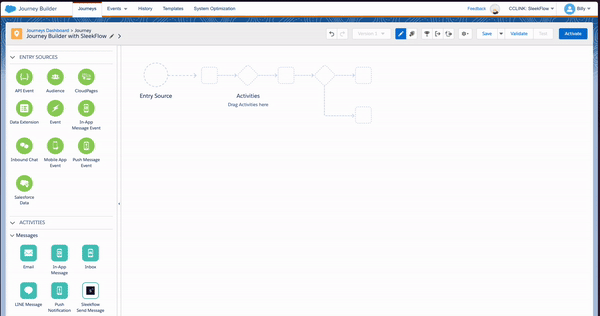
Sending SleekFlow WhatsApp messages on Salesforce Marketing Cloud Journey Builder
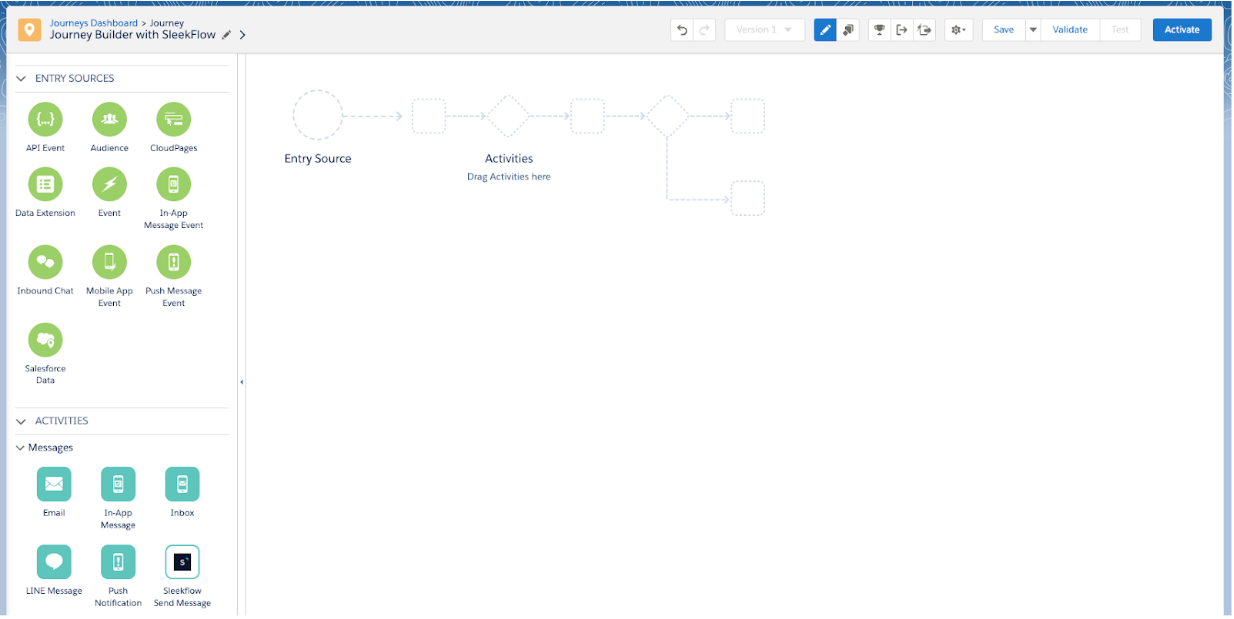
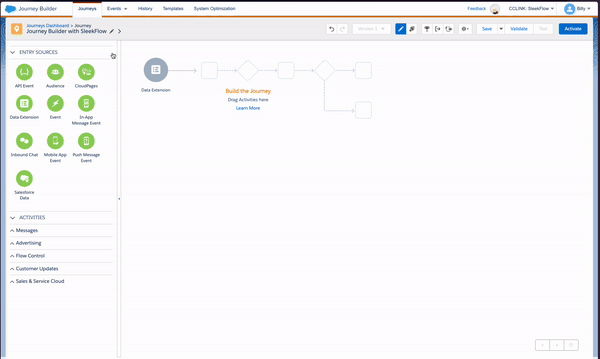
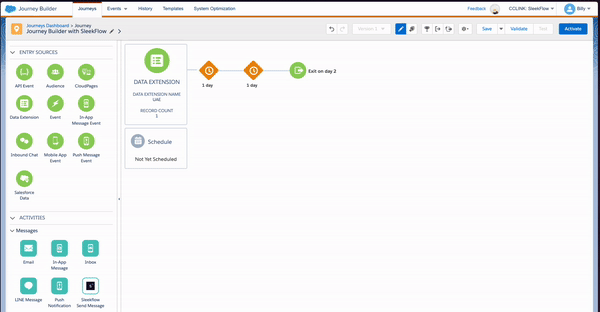
After you have installed the SleekFlow app in your Salesforce user account, you will be able to send SleekFlow WhatsApp messages on Salesforce Journey Builder. You will be configuring the action as a “Data Extension” in Salesforce Journey Builder. Data Extensions in Journey Builder act as a bridge to sync customer data between platforms, enabling personalized, targeted messaging across SleekFlow’s channels.
You can follow the steps below to configure the send WhatsApp messages action within Salesforce Journey Builder:
-
Select and drag “Data Extension” to the Entry Source location
-
Click on the “Data Extension” and configure the Data Extensions you would like to use within this journey
-
Once you set up the data extension, drag the SleekFlow app you installed to the flow where you want to send a WhatsApp message through SleekFlow
-
To configure the message, click on the SleekFlow app icon within the flow, a pop-up window will display
- Follow the steps below to configure the “Send Message” action on Journey Builder:
-
Insert API key
- Select the Data Center for your SleekFlow company. You must choose the same Data Center as your SleekFlow company account to ensure the action is set up correctly. If you are unsure which Data Center your company is in, please contact the SleekFlow support team.
- Enter your Salesforce Marketing Cloud API key to authenticate the action. You can refer to this guide on finding your Salesforce Marketing Cloud API.
-
Note: If you update the API key, any previously filled fields in Steps 2 and beyond will be cleared.
-
Select WhatsApp channel and recipient
- Choose the WhatsApp Business phone number linked to your SleekFlow account.
- Specify the recipient’s phone number manually or use a variable from Data Extension.
-
Define analytics tags
- Add analytics tags to categorize and track messages within the SleekFlow analytics dashboard.
- Using these tags allows you to filter and analyze relevant messages more efficiently.
-
Fill in message content
- Choose one of the following message formats:
- Template message: Use a pre-approved WhatsApp template. Ensure all variables are filled in.
- Manual input: Enter a plain text message.
- Attachment: Upload a file to send as an attachment (note that this will fail if the recipient’s messaging window has expired).
- Choose one of the following message formats:
-
Preview your message
- Review the configured message to ensure accuracy before sending.
- Review the configured message to ensure accuracy before sending.
-
Validate message settings (optional)
- Once you have completed the configuration, click the “Validate” button to verify the setup. This ensures all required information is correctly provided, preventing message delivery failures.
- Once you have completed the configuration, click the “Validate” button to verify the setup. This ensures all required information is correctly provided, preventing message delivery failures.
-
Insert API key
- Once you are all set, you can select “Done”, repeat step 3 again if you want to add additional send SleekFlow WhatsApp actions within your journey