


All action nodes require setting up in a node form, where you specify the parameters for the selected action.
In this article, we will guide you on how to set up every “Google Sheet” action nodes so your flow can execute the appropriate tasks to achieve your desired outcome.
Before configuring Google Sheets action nodes, you will need to set up your Google Sheets integration first. You can refer to the Help Center article here to set up your Google Sheets integration.
Search Google Sheet rows
The “Search Google Sheet row” action node searches for and retrieves the matching rows in the selected Google Sheet based on the specified search conditions. This action is often used together with the “Update Google Sheet row” action node, allowing you to dynamically locate a specific row and update its details seamlessly within your workflow.
To set up the node, follow these steps:
-
Click on the “Search Google Sheet rows” action node to open up its form, which will appear on the right side of the screen
- Select a Google account. If no Google account is connected, you can refer to the Help Center article here to set up your Google Sheets integration.
- Select a Google Sheet and a Sheet within
- Select the header row to define column names for your data. For complex sheets, select the header row that defines property names for your data. Any data above this row will be discarded. Learn more about select header row for Google Sheets in this section.
-
The node form contains the following fields for you to configure your action:
- Search conditions: This is an optional step for you to define the search condition
- Add condition: You can click “Add condition” to add more search conditions


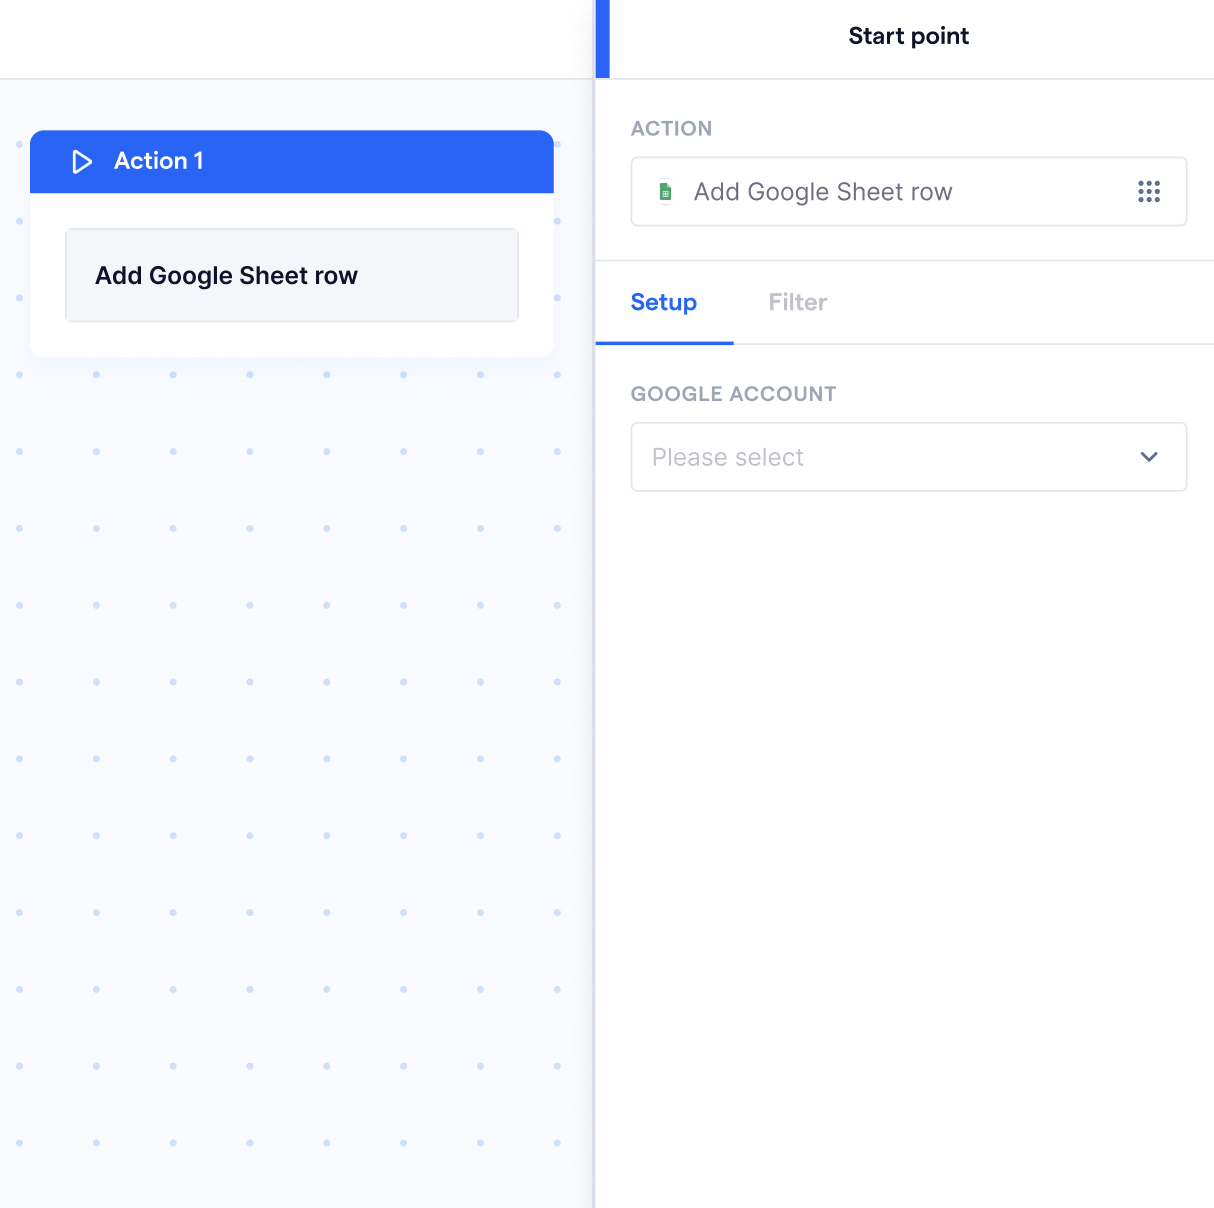
Add Google Sheet row
The “Add Google Sheet row” action node allows you to insert a new row into the selected Google Sheet with predefined values. You can use this to log customer details, transaction records, or any relevant data automatically.
To set up the node, follow these steps:
-
Click on the “Search Google Sheet rows” action node to open up its form, which will appear on the right side of the screen
- Select a Google account. If no Google account is connected, you can refer to the Help Center article here to set up your Google Sheets integration
- Select a Google Sheet and a Sheet within
- Select the header row to define column names for your data. For complex sheets, select the header row that defines property names for your data. Any data above this row will be discarded. Learn more about select header row for Google Sheets in this section.
-
The node form contains the following fields for you to configure your action:
- Map column values: Select the Google Sheet columns where data should be added. You will need to map each column to a corresponding variable or static value.
- Add condition: You can click “Add Condition” to include more columns as needed

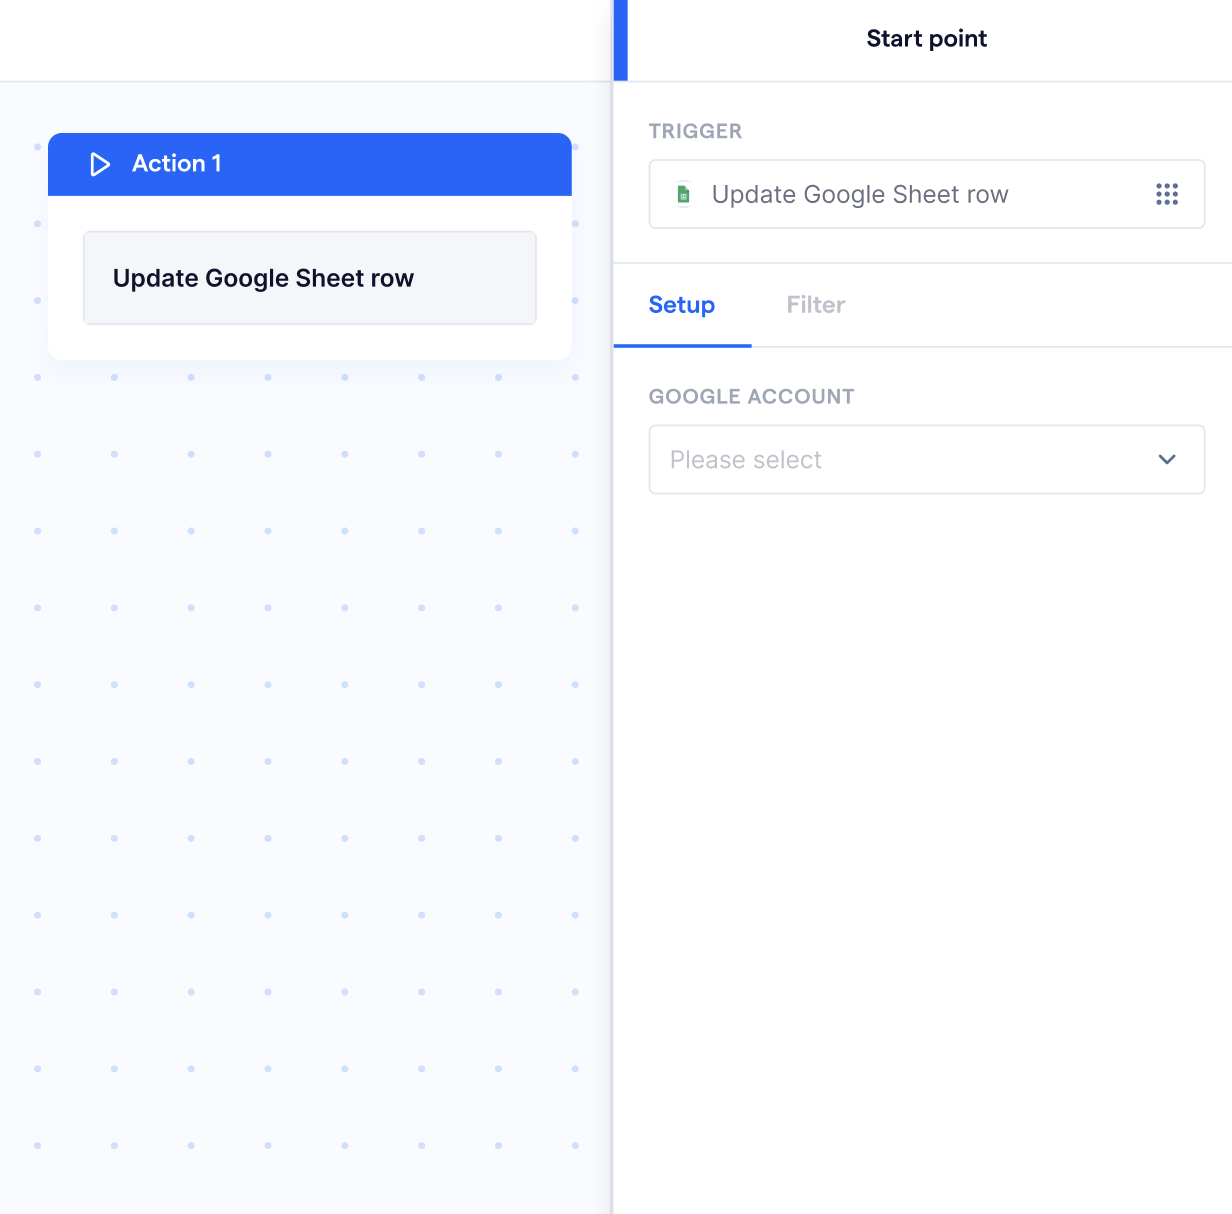
Update Google Sheet row
The “Update Google Sheet row” action node modifies an existing row in the selected Google Sheet based on specified conditions. It ensures that records remain accurate and up to date without manual edits.
To set up the node, follow these steps:
-
Click on the “Search Google Sheet rows” action node to open up its form, which will appear on the right side of the screen
- Select a Google account. If no Google account is connected, you can refer to the Help Center article here to set up your Google Sheets integration
- Choose a Google Sheet and specify the Sheet where the row should be updated
- Select the header row to define column names for your data. For complex sheets, select the header row that defines property names for your data. Any data above this row will be discarded. Learn more about select header row for Google Sheets in this section.
- Configure the following fields in the node settings:
-
Select row
- Select the row that needs to be updated
- You can choose to update a static row by selecting a specific row, or select flow variables
-
Map column values
- Specify the column headers to update in the selected row
- Assign new values to these columns, either as static values or dynamic variables from the flow.
-
Add condition (optional)
- Click “Add Condition” to include additional columns for updates.
-
Select row

💡 Tips for selecting header row for complex Google Sheets
Make sure to select the correct header row—this tells SleekFlow where to start reading your data. For simple sheets, this is usually the first row. For more complex sheets (e.g. those with titles, merged cells, or multiple sections), choose the row where your column names or property labels begin.
Any data above the selected header row will be ignored.
✅ Example 1: How a simple Google Sheet should be structured
Let’s say your Google Sheet includes instructions or grouped content before the actual data starts:

In this example:
- Rows 1 and 2 contain meta info or titles.
- Row 3 is where the actual column headers begin.
You should select row 3 as your header row when configuring the Google Sheets action node—this ensures the system correctly maps Name, Email, and Source as column names and fetches the data accordingly.
✅ Example 2: Complex eCommerce sheet with metadata and multiple side notes

In this example:
- Row 1 contains internal notes and report metadata
- Row 2 is where the actual headers begin
You should select row 2 as your header row. This allows SleekFlow to correctly read structured columns like Order ID, Email, Add-ons, and Status, while ignoring the content above.